Try TriSpiral Again

August 5th, 2008

Decided to work on the gradient for the Tri Spiral and give it another go.  This time I used the Gimps shaped angular gradient to make the center of each arm of the spiral light and the outer edges dark.  After this I selected the white background and changed it to black.

This left the edge still with a little lighter shade then the black background.  Since I did not want the edge milled higher, I used the brush tool to write over all of this slightly lighter color with solid black.  This picture is before the final edit, notice the white on the edges.

Read the rest of this entry »

Home is Where the Heart is…

August 5th, 2008

Finally figured out the home switches.  It turned out to be pretty simple once I got moving on it.  There were three wires coming out of each optical switch.  After probing around, it was discovered that:

Purple was +5 volts

Yellow carried the signal, either high or low of the switch

Black was connected to ground.

These connections were found by carefully piercing the the insulation of each of the 3 wires with a sharp stick pin and then probing with a continuity meter in the wiring box to locate were the connection came out.  Once the associated screw terminals were located, it was pretty easy to use the ohmmeter to find the pins on the parallel port connector.

Read the rest of this entry »

TriSpiral

July 30th, 2008

This was my first try at the EMC plugin Image-to-gcode now included with EMC.  It allows you to open an image file and after changing some preference settings converts this to file to gcode.  It produces a height or depth map of the image, where all dark areas are low and all light areas are high, or the inverse, your choice.

I started with a solid black png, downloaded through google images.

Read the rest of this entry »

Chips

July 23rd, 2008

Finally, my first cuts in Aluminum and success.

Cuts were made in the aluminum mentioned in the previous post using a 1/8″ two flute endmill purchased from  drill bit city.  The design was drawn up in CamBam and for some reason I could not get the holes that were in the drawing to port over to EMC.  To continue the process and not fight with the software, the holes were omitted.  In retrospect this was probably lucky, as the holes were the size of the endmill and there is a good chance trying to plunge the endmill straight down through the aluminum would have resulted in a broken bit.

Read the rest of this entry »

Stall

July 22nd, 2008

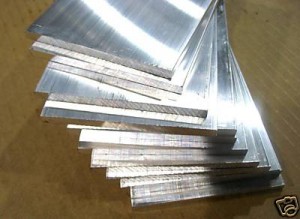
Been sort of stalling. Trying to prepare, to move on with the project. I am trying to wrap my head around the feed rate, spindle speed, dry cut aluminum game. Going from ideas in my head to the finished product, there are still some weak links. The first project thats been getting focus, is a heat sink for a Luxeon Star. This is a 3 watt tri-color led that dissipates some heat when working. The heat sink is a simple milling operation, chunk of aluminum, holes for the star, holes for mounting. This is something that I would normally cut out with a saw, and drill with a hand drill. It seemed like a good first CNC trial, start to finish in aluminum. The first step was tracking down the material. Lots of aluminum alloys to choose from. I ended up with a stack of surplus 6105-T5 aluminum alloy. This is from 80/20 surplus on ebay, each piece is about 3″ x 5″ x .180 thick, total price about $1.50 a sheet including shipping.

Read the rest of this entry »

…IT Can Cut IT…

July 10th, 2008

Wow, at long last, some cuts in soft wood!

Nothing special, and certainly not perfect results, but, at least the machine is cutting instead of drawing, so thats something.  Learned a lot very quickly too!

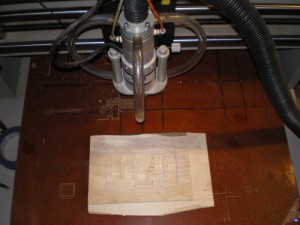
First attempt was a pocket 4×6 inches by .08 inches deep.  Spindle speed was set at 12,000.  Used a 1/8″ two flute end mill and a Feed Rate of 7″ per min.  I tried cutting this in .020 inch passes.

The machine cut fine and the control software worked well, its just that a 4×6 pocket being made with a small end mill such as this, at this feed rate takes forever.  I stopped it after the second pass, it really would have taken several hours to complete, but it was a fine first run.

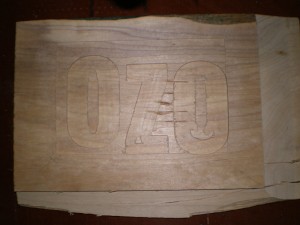
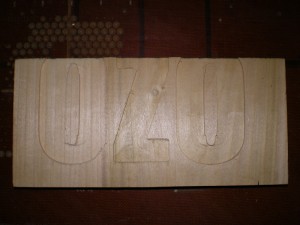
Next I used CamBam to knock up some text to cut, I used the pocket feature again.  Increased Feed Rate to 15 inches a min.  Went pretty smooth, but lost steps do timing errors, I think, associated with having the USB thumb drive plugged in while running the RTOS.  These two don’t seem to play nice together.  Still I was very pleased with the outcome.  Note the stab wounds in the wood were there before I started cutting 😉

The next day I tried again, same settings no thumb drive.  This resulted in no missed steps, but I had a fairly obvious alignment issue!

Still these were very good learning experiments, they quickly taught me about feed rate, and spindle speed.  CamBam is working the trick for quickly building up designs.  I may experiment around with some more wood or foam cuts, but I am really dieing to try aluminum.  That will be the real test.

This is a quick Tutorial on speed and feed rates I found useful for this step…

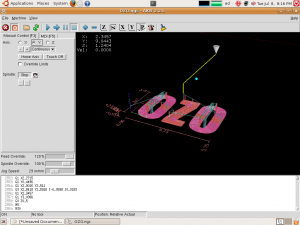
and a screenshot of EMC showing the OZO text tool path

Onward…

Spindle Speed Control

July 9th, 2008

Finally got the spindle working with a square wave produced by the computer.

I am using the StepGen component of the Hal. I am using a type = 2 which produces a quadrature signal. One phase of this is fed to pin 1 on the parallel port which connects to pin 11 on the machine. This component is tied, in the Hal to the spindle control, the same as it was with the pwm signal that was giving me so much trouble.

Now I can finally change the spindle speed with M3 commands and get a variable square wave out of the parallel port pin. The spindle works much better with this type of signal and I am now able to control the speed.

I had a few problems trying to set this up and could not have done it at all without the help of Jepler on IRC freenode #EMC.  Thanks so much to him for his help and pointing me in the right direction.

First I had to learn something more about the Hal file and how Hal actually works. Up till this point I had been using the Wizard StepConf to configure EMC. There is only so far the Wizards can take you and this maneuver crossed the boundary.

Also, I migrated to a different machine, and installed Hardy, the newest LTS Ubuntu at the same time I was mucking around in my Hal file. I ended up with lots of screwy errors, never change everything all at once, its a bad idea.

Turns out I had commented something out in the Hal file that I shouldn’t have, days ago, and it was screwing everything else up after the computer migration. Once I braced up, went back to the original config and basically started over, I realized what was going wrong.

Trying to use the distro images I downloaded from the EMC web site did not work out well for me either, I tried a few times to install, with lots of disk errors after the restart and general flakiness. Finally, I downloaded an official Alternate CD from Ubuntu and installed that, breeze, then installed EMC, now everything seems to be working pretty well again. I did try two separate downloads and burns of the EMC image with no luck, it installed fine, just wouldn’t run afterwards worth a flip.

After I managed to get controllable square waves coming out of the proper pin I gathered some data on the speed of the spindle.  Hooking a scope to pin 15 on the  Spindle Motor Control Board I found that if you turn the spindle by hand you get two high outputs per revolution.  There is feedback from the spindle that comes to this pin (S1 & S2).  So, by sending the machine different M3 speed commands I was able to keep adjusting the Position-Scale variable in the Hal file until the speed commands almost matched the actual speed of the spindle.

Here is what I ended up with that worked out to be the best:

Position-Scale = .045

Set Speed Measured Speed
1000 2400
5000 6000
10000 11190
20000 21600
30000 27900
35000 28800

Helpful Documents for figuring this out:

StepGen overview that explains various step types.

Wiki page that covers types in some more detail.

Notes from jepler that I got on IRC (Thanks again!)

Ozo.hal file that I eventually ended up with.

Finally, I can cut some material…

Z-Axis Probe Update

June 27th, 2008

So, finally got the motherboard, back in the machine and everything, drilled, wired, soldered, etc… and… It don’t work 😉

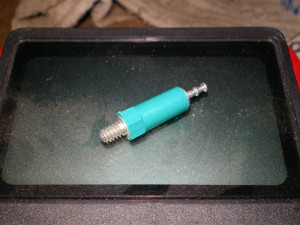
Come to find out that the cool and groovy old green binding post I used has no conductivity from top to bottom.  That’s right folks if you have not learned the lesson all ready, you probably will again, never assume.

Lucky for me it was easy to figure out and I was able to remove the binding post without taking the motherboard back out.  I replaced it with a small bolt and lock nut. Added another ring connector for the wire on the top side of the board.   WahLah, it works!

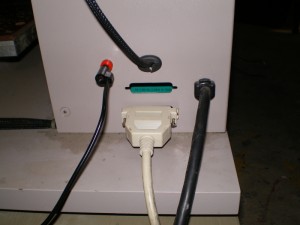
I added a banana jack to the back of the machine so I can plug different types of probes in, I would really like to do some Scanning .

I spent some time last night trying to get the hang of Zeroing out the Z-axis with the probe.  Still having a bit of trouble with the concepts and the gcode.  The nice folks on #EMC irc freenode are helping me out.

The idea is you use G38.2 (May be for EMC only) like:

G38.2 Z-1 F1 (Tries to move Z axis below work surface stops at probe top)

G92 Z.060  (Moves Origin to new location, this is the tricky part, .060 just compensates for probe height)

Will post back more when I actually get a good system going.

EDIT: Thanks to SWPadnos Coordinate Systems in the wiki really helps.

Hold On, Hold Down

June 24th, 2008

I am almost to the point that I can actually start making chips, and have been thinking about material hold down options.  Ahhh, the little things 😉

Here are couple of articles I found interesting…

Drewtronics writeup on a vacuum table hold down system that looks really nice for circuit boards or other small flat objects.

I’ll probably start with some double face tape and see how that does.  Somewhere in my junk pile I have a couple of old, 1/4″ thick pieces of fiberglass that have an array of holes.  This may have been some kind of heavy duty prototyping breadboard back in the day.  It seems like it may work well as a hold down jig for the moment, while I get a feel for the machine and learn about other options.  I may add to this post as I find more hold down techniques.

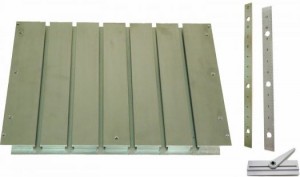
Just a picture of one way to construct a t-slot table…

CNCzone Comprehensive list of different hold down techniques

MojoSofts site detailing some very interesting holdown tables etc…

Z-Axis Touch Plate

June 24th, 2008

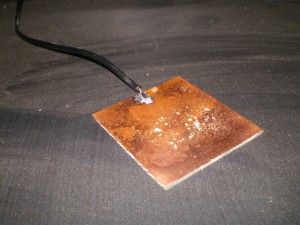
A touch plate or zero plate is used to zero the toolbit on the Z-axis.  I first saw this in a Hackaday post about quick CNC setup routines.   This person uses a usb pendant, laser and touch plate to very quickly set up a piece of work in the machine.   Here is a link to the video and post…

My machine would really benefit from this setup.  First the machine is far enough away from the computer that I can’t easily see whats going on (I think this must change anyway),  second the spindle I am using has a brush on the bottom that blocks the view of the bit.  The brush is nice, as it locks in debris and helps the vacuum remove chips.  However, it touches down first before the bit makes contact and makes it hard to tell when the bit reaches the surface of the work.

To make this work you need an input pin on the parallel port pulled high and then connect this input pin to a conductive plate.  When the bit, which is at ground potential, touches the plate, it will pull the pin low and signify that the top of the work has been reached, just compensate for the thickness of the plate in software.

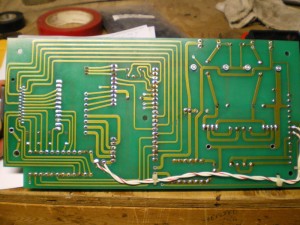
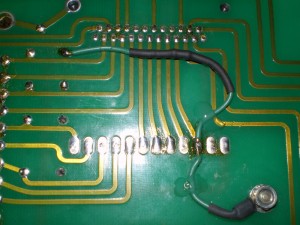
I had to pull the mother board out in order to see the bottom of the connector, find a 5 volt rail and map my pull-up resistor to one of the connector pins.  I have been wanting to pull this board off for a while just so I could get a picture of the underside.

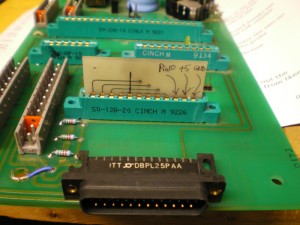
Pin 10 goes to the small jumper board but no where else 🙂 Its also an EMC software input.

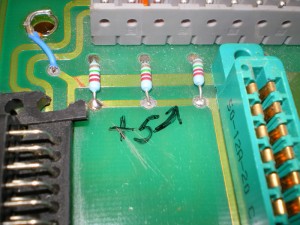
I found a 5 volt rail close by

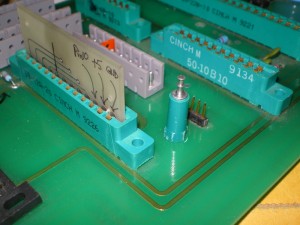
There are number of these old binding post in my parts bin, so I decided to use one, had to drill a hole in the board, however I love the way it matches the connectors.

I wired the connector pin for the parallel port to the 5 volt rail through a 10k pullup resistor and wired the connector pin to the binding post.  Now all I have to do is bring the binding post low and the probe pin output should change, indicting the bit has reached the surface of the plate.

Looks kind of orginal from the top, hope it works…