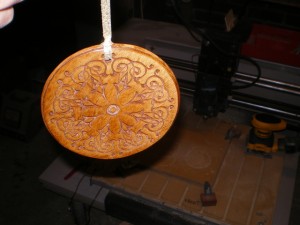
For Christmas this year I decided to put the machine to work on a production run of unique ornaments for friends and family. The goals of this project where to experiment with some different techniques for using the machine and to test out a few ideas for future projects at the same time. The results were good over all and I learned a few things in the process?
Archive for the ‘CNC-Objects’ Category
Christmas Ornaments
Friday, December 25th, 2009Light Box
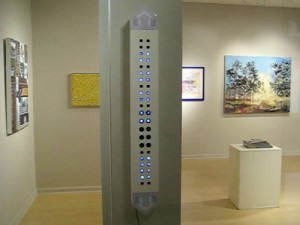
Monday, October 26th, 2009A friend and I spent some time a few months ago collaborating on an art piece. His Light Boxes usually consist of some translucent material, film, printed transparency, large prints, envirotex casts etc, that are mounted in or on a box, with a light behind. Sometimes the light moves, sometimes the piece moves, sometimes both are static. We decided to see if we could combine our skills and come up with something a little more dynamic, possibly even something that people viewing the piece could interact with.
New HeatSink
Monday, October 26th, 2009This Project Actually Completed January 2009
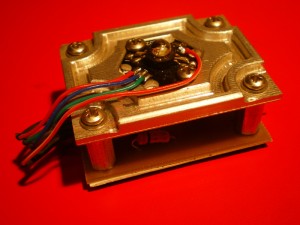
This is a revision of the aluminum heat sink we have been using for the the 3 watt tricolor LED control boards. These will serve as generic tricolor led drop in modules for future art pieces. The control board has 3 FET control channels 1 for each color and a microcontroller, for the brains. On the top sits the LED nestled in its heat sink to keep it cool. The whole assembly in its present incarnation looks like this.
Sun Light
Monday, October 26th, 2009This project was actually completed in March 2009, WOW!!!
Our house was built in the 30’s and some some of the fixtures are still from that time period. One of the rooms in our house had and old bare bulb in the ceiling, it used to be switched by a pull chain but that had long since broken. The only way to turn the light on was to reach up and screw the bulb in, and reverse the process to turn it off. Not so fun!
After removing the old fixture, I realized the ceiling tiles around opening were very tattered, cracking and peeling back. The base of my new light was not large enough to cover the area, and the ceiling tiles were way to old to be replaced. Thinking about some way to cover this area before I put up the light, my brain saw the opportunity to use the CNC machine. Aha!! I had figured out a way to spend the Saturday playing with the machine in the guise of working on the house, brilliant. 😉
Broken Bracket
Monday, January 12th, 2009A long while back I put together a headlamp using a luxeon star 3 watt LED and some driver electronics from Ladyada. Everything worked fine and life was good. Recently however, when I reached for my trusty friend I found the strap dangling loosely. One of only a few plastic pieces on the light had snapped.
Originally, when I made the light, I drew the plastic bracket in a 2D CAD program and then printed onto paper, traced it onto plastic and then cut it out with an exacto blade. Now times have changed and I wanted to use the OZO to make another one.
How much wood would an…
Monday, January 12th, 2009Ozo cut if an OZO would cut wood!
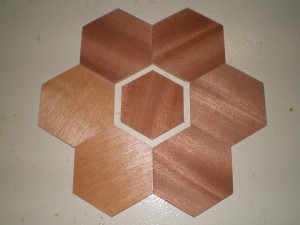
Had a bit of time to fool with the machine over the Holidays and decided to try out the new hold down techniques and cut some thin wood. It went pretty well, all thing considered. I cut what appears to be thin mahogany surfaced plywood sourced from the local mantle shops bin.
Watch Out for the Fire Ant
Thursday, August 21st, 2008Just found a great resource for open source images. Its called WikiMedia commons. It works like WikiPedia, volunteers post, edit, and manage multimedia content. The media content that then ends up on in the site library is open for any use commercial, private or otherwise.
What this means for me is a source of almost ready made artwork for the CNC machine. Many illustrations are in SVG format, vector instead of raster, and can be easily edited and resized with InkScape.
As a test I started with this original image except I got the SVG version,
Try TriSpiral Again
Tuesday, August 5th, 2008Decided to work on the gradient for the Tri Spiral and give it another go. This time I used the Gimps shaped angular gradient to make the center of each arm of the spiral light and the outer edges dark. After this I selected the white background and changed it to black.
This left the edge still with a little lighter shade then the black background. Since I did not want the edge milled higher, I used the brush tool to write over all of this slightly lighter color with solid black. This picture is before the final edit, notice the white on the edges.
TriSpiral
Wednesday, July 30th, 2008This was my first try at the EMC plugin Image-to-gcode now included with EMC. It allows you to open an image file and after changing some preference settings converts this to file to gcode. It produces a height or depth map of the image, where all dark areas are low and all light areas are high, or the inverse, your choice.
I started with a solid black png, downloaded through google images.
