Archive for June, 2011

Capacitive Liquid Level Sensor

Thursday, June 30th, 2011

Capacitive sensors of all sorts have been an interest of mine. They become interesting when you start to discover the huge variety of applications they are used for. While doing research for the new Control Panel in our airstream, I came across a couple of varieties of what appear to be a capacitive liquid level sensor for tanks. The TechEdge moda sensors appear to be capacitive based if you download there moda sensor manual and have a look.

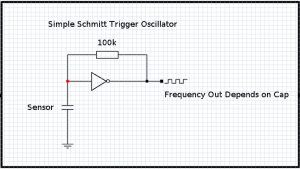
These sensors incorporate two sheet aluminum plates that when stuck in proximity to one another on the tank form a small capacitor between them. Filling the tank with water changes the dielectric and therefor the capacitance. I decided to conduct a little experiment to see if I could do something similar.

(more…)

Zsurf

Monday, June 27th, 2011

zSurf4  is a utility that allows you to import a bitmap and export a surface.

You can find a copy at http://mwt.net/~sjedging/ZSURF4.zip

There is spotty info out there about this program, but its rather nice if you can figure out how to use it.  The best tutorial I found is unfortunately not in English, however google translate helps with that.

The tutorial will give you a working knowledge Zsurf, at least enough to get started.  I would like to add a method to start with a photograph of an object like a gear and end in a 3D surface.  Note that the original is a pretty poor quality black and white image.

Zsurf likes very high contrast images.  The image below if processed as is produces a very rough, jagged surface, raising all the dark spots and lowering all the white.

Here is the starting image, its a clock escapement wheel, its a jpeg image, of an actual photograph of a real escapement wheel.

(more…)

Holding Tabs

Monday, June 27th, 2011

If possible I like to have some tabs, holding the piece that I am cutting out to the block that I am cutting from.  For a while I was searching for a CAM program that would add these tabs for me, like Visual Mill.  Now I realize, after watching some MadCam training videos that I can do this myself in my drawing software.  What follows is an outline of the steps for reference.

(more…)

Sure Electronics LED

Monday, June 27th, 2011

After spending a bunch of time playing around with high output surface mount leds from lumex, designing a board and running tests etc…  I stumbled on this interesting led module being sold on ebay by a seller named Sure Electronics.  I’ve gotten stuff from them before, usually turns out good, and this was all told 10.00 dollars or so shipped.  It looked like it came with a control board, and from looking at the photos, it appeared to be a bog standard, PIC micro, so…  What the heck, worth a play…

(more…)

Control Panel – Step 7

Monday, June 27th, 2011

Ok, now for the Arduino, yup, its got to happen.  I debated and debated, but I gave in to my own peer pressure.  I just had to put a microcontroller on our control panel, it only makes sense 😉

(more…)

Control Panel – Step 6

Sunday, June 26th, 2011

So the current meter had me stumped.  At first I thought it may be the charger for the battery, but, nope.  Next I thought it had something to do with the fact I was running off upstream shunt side of ground.  Switching to a direct ground connection didn’t help either.  However, in the process of trouble shooting I figured out that if I ran the meter off an isolated supply, it worked perfectly.

(more…)

Control Panel – Step 5

Saturday, June 25th, 2011

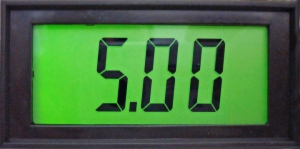
Finally Electronics. 😉  I ordered some nice big LCD panel meters from Circuit Specialist.  I felt a little foolish doing this as a whole harbor freight multi meter only costs 5$ 1/3 of the price of fancy snap in panel meter, but, the harbor freight meters rely on a 9V battery and are physically large and hard to mount.

(more…)

Control Panel – Step 4

Friday, June 24th, 2011

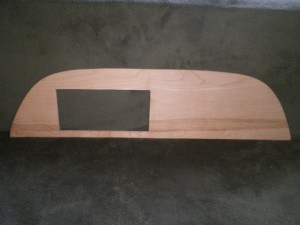
Now it was time to replace the old board, with a new one.  We decided to make it a little longer and round the corners to match the contoured curve at the top of the trailer.  After some measuring and playing around with the design in Rhino, we made a large paper template and used it to mark out the board.  Unfortunately the size of the board was to large to fit in the CNC, or I could have made a perfect cut, instead I had to resort to the old scroll saw.

(more…)

Control Panel – Step 3

Thursday, June 23rd, 2011

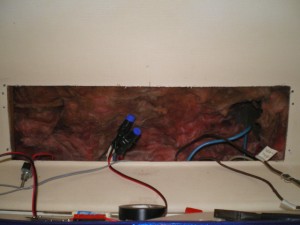
After removing the board that was our old control panel I fished out the shunt wires and tested to make sure they still had a connection to the back of the trailer.  Also at the same time I found the brown insulated multi conductor wires for the water tanks sensors.

(more…)

Control Panel – Step 2

Tuesday, June 21st, 2011

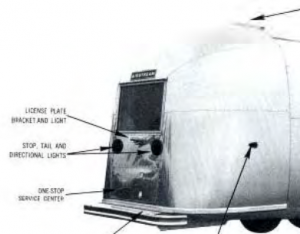
Since I wanted to have a current meter on the control panel the first step wast to go through all the wiring in the “One Stop Service Center”.

(more…)