Archive for July, 2008

TriSpiral

Wednesday, July 30th, 2008

This was my first try at the EMC plugin Image-to-gcode now included with EMC.  It allows you to open an image file and after changing some preference settings converts this to file to gcode.  It produces a height or depth map of the image, where all dark areas are low and all light areas are high, or the inverse, your choice.

I started with a solid black png, downloaded through google images.

(more…)

Chips

Wednesday, July 23rd, 2008

Finally, my first cuts in Aluminum and success.

Cuts were made in the aluminum mentioned in the previous post using a 1/8″ two flute endmill purchased from  drill bit city.  The design was drawn up in CamBam and for some reason I could not get the holes that were in the drawing to port over to EMC.  To continue the process and not fight with the software, the holes were omitted.  In retrospect this was probably lucky, as the holes were the size of the endmill and there is a good chance trying to plunge the endmill straight down through the aluminum would have resulted in a broken bit.

(more…)

Stall

Tuesday, July 22nd, 2008

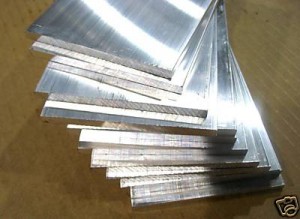
Been sort of stalling. Trying to prepare, to move on with the project. I am trying to wrap my head around the feed rate, spindle speed, dry cut aluminum game. Going from ideas in my head to the finished product, there are still some weak links. The first project thats been getting focus, is a heat sink for a Luxeon Star. This is a 3 watt tri-color led that dissipates some heat when working. The heat sink is a simple milling operation, chunk of aluminum, holes for the star, holes for mounting. This is something that I would normally cut out with a saw, and drill with a hand drill. It seemed like a good first CNC trial, start to finish in aluminum. The first step was tracking down the material. Lots of aluminum alloys to choose from. I ended up with a stack of surplus 6105-T5 aluminum alloy. This is from 80/20 surplus on ebay, each piece is about 3″ x 5″ x .180 thick, total price about $1.50 a sheet including shipping.

(more…)

…IT Can Cut IT…

Thursday, July 10th, 2008

Wow, at long last, some cuts in soft wood!

Nothing special, and certainly not perfect results, but, at least the machine is cutting instead of drawing, so thats something.  Learned a lot very quickly too!

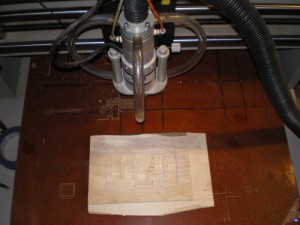
First attempt was a pocket 4×6 inches by .08 inches deep.  Spindle speed was set at 12,000.  Used a 1/8″ two flute end mill and a Feed Rate of 7″ per min.  I tried cutting this in .020 inch passes.

The machine cut fine and the control software worked well, its just that a 4×6 pocket being made with a small end mill such as this, at this feed rate takes forever.  I stopped it after the second pass, it really would have taken several hours to complete, but it was a fine first run.

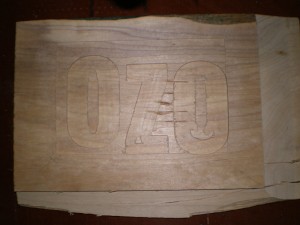
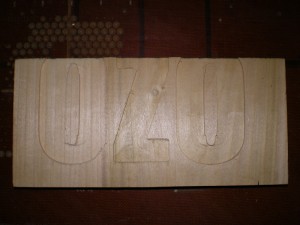
Next I used CamBam to knock up some text to cut, I used the pocket feature again.  Increased Feed Rate to 15 inches a min.  Went pretty smooth, but lost steps do timing errors, I think, associated with having the USB thumb drive plugged in while running the RTOS.  These two don’t seem to play nice together.  Still I was very pleased with the outcome.  Note the stab wounds in the wood were there before I started cutting 😉

The next day I tried again, same settings no thumb drive.  This resulted in no missed steps, but I had a fairly obvious alignment issue!

Still these were very good learning experiments, they quickly taught me about feed rate, and spindle speed.  CamBam is working the trick for quickly building up designs.  I may experiment around with some more wood or foam cuts, but I am really dieing to try aluminum.  That will be the real test.

This is a quick Tutorial on speed and feed rates I found useful for this step…

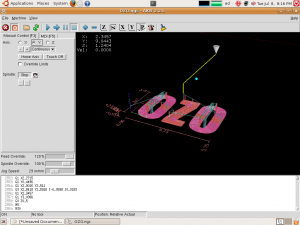
and a screenshot of EMC showing the OZO text tool path

Onward…

Spindle Speed Control

Wednesday, July 9th, 2008

Finally got the spindle working with a square wave produced by the computer.

I am using the StepGen component of the Hal. I am using a type = 2 which produces a quadrature signal. One phase of this is fed to pin 1 on the parallel port which connects to pin 11 on the machine. This component is tied, in the Hal to the spindle control, the same as it was with the pwm signal that was giving me so much trouble.

Now I can finally change the spindle speed with M3 commands and get a variable square wave out of the parallel port pin. The spindle works much better with this type of signal and I am now able to control the speed.

I had a few problems trying to set this up and could not have done it at all without the help of Jepler on IRC freenode #EMC.  Thanks so much to him for his help and pointing me in the right direction.

First I had to learn something more about the Hal file and how Hal actually works. Up till this point I had been using the Wizard StepConf to configure EMC. There is only so far the Wizards can take you and this maneuver crossed the boundary.

Also, I migrated to a different machine, and installed Hardy, the newest LTS Ubuntu at the same time I was mucking around in my Hal file. I ended up with lots of screwy errors, never change everything all at once, its a bad idea.

Turns out I had commented something out in the Hal file that I shouldn’t have, days ago, and it was screwing everything else up after the computer migration. Once I braced up, went back to the original config and basically started over, I realized what was going wrong.

Trying to use the distro images I downloaded from the EMC web site did not work out well for me either, I tried a few times to install, with lots of disk errors after the restart and general flakiness. Finally, I downloaded an official Alternate CD from Ubuntu and installed that, breeze, then installed EMC, now everything seems to be working pretty well again. I did try two separate downloads and burns of the EMC image with no luck, it installed fine, just wouldn’t run afterwards worth a flip.

After I managed to get controllable square waves coming out of the proper pin I gathered some data on the speed of the spindle.  Hooking a scope to pin 15 on the  Spindle Motor Control Board I found that if you turn the spindle by hand you get two high outputs per revolution.  There is feedback from the spindle that comes to this pin (S1 & S2).  So, by sending the machine different M3 speed commands I was able to keep adjusting the Position-Scale variable in the Hal file until the speed commands almost matched the actual speed of the spindle.

Here is what I ended up with that worked out to be the best:

Position-Scale = .045

Set Speed Measured Speed
1000 2400
5000 6000
10000 11190
20000 21600
30000 27900
35000 28800

Helpful Documents for figuring this out:

StepGen overview that explains various step types.

Wiki page that covers types in some more detail.

Notes from jepler that I got on IRC (Thanks again!)

Ozo.hal file that I eventually ended up with.

Finally, I can cut some material…