Recently found this really interesting utility for Google Sketchup. Its called SliceModeler, it gives you the ability to slice up your sketchup model into pieces and then make them flat for cutting out of sheet material. Great idea and concept for me.
Posts Tagged ‘OZO CNC Rebuild’
Slice me off a little piece
Monday, January 12th, 2009Broken Bracket
Monday, January 12th, 2009A long while back I put together a headlamp using a luxeon star 3 watt LED and some driver electronics from Ladyada. Everything worked fine and life was good. Recently however, when I reached for my trusty friend I found the strap dangling loosely. One of only a few plastic pieces on the light had snapped.
Originally, when I made the light, I drew the plastic bracket in a 2D CAD program and then printed onto paper, traced it onto plastic and then cut it out with an exacto blade. Now times have changed and I wanted to use the OZO to make another one.
How much wood would an…
Monday, January 12th, 2009Ozo cut if an OZO would cut wood!
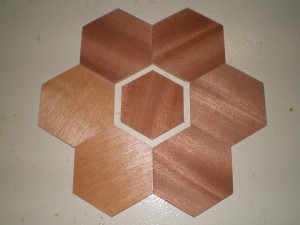
Had a bit of time to fool with the machine over the Holidays and decided to try out the new hold down techniques and cut some thin wood. It went pretty well, all thing considered. I cut what appears to be thin mahogany surfaced plywood sourced from the local mantle shops bin.
Dumpster T-Slots =/
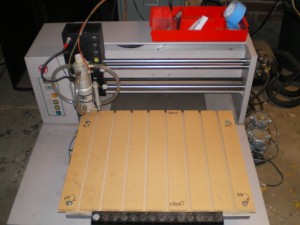
Thursday, November 20th, 2008Out behind the local Pier One and leaning up against the bin was this really neat looking T slot material. Not real wood mind you, but still fairly stout and it should work for the kind of small stuff that I have been cutting. This is what it looks like installed.
Close Control
Thursday, September 18th, 2008The opposite of remote control.
So far, considerable time is being spent, finding the Zero position on the work. Part of the reason has been that the computer keyboard and the machine are about 10 feet apart and my back is to the machine while I am at the keyboard controlling it. This has led to some body contortions and running back and forth about 10 times to tweak the machine into the X0 Y0 position.
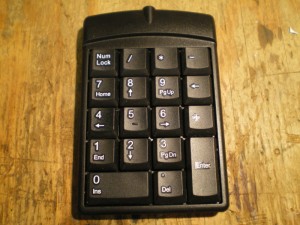
The solution, a pendant!
I found this el cheapo USB numeric keypad at Big Lots $6
Finding that edge
Thursday, September 18th, 2008When setting up the machine its proved hard to tell where the bit center is in relation to the work. There is a shroud around the bit and in some instances a brush. This means lowering the Z axis and then eyeballing from the front and the side, peering under the brush with a flashlight, run back to the keyboard, jog, jog etc…
A while back I found this video posted on Hackaday and realized there was a better way.
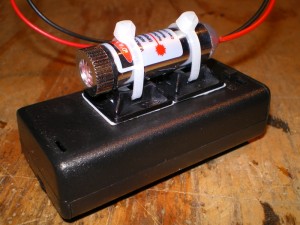
I started with a crosshair laser from deal extreme, yes I ordered other stuff too as it was to hard to resist.
Encoders Revisited
Tuesday, September 9th, 2008Prompted by my friend Michael I decided to take another look at the encoder set up on the OZO machine.
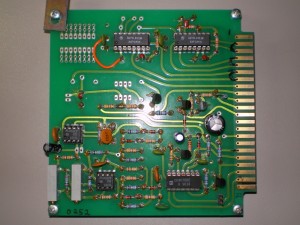
The encoder board, has the spindle signal conditioning circuit mentioned in previous post as well as two SN74LS123 Monostable Multivibrators. Its my guess that these chips act as one shots, conditioning the signals coming from the encoders. On the encoder board pictured below, pin 1 is at the top and 22 is at the bottom. Encoder signals are marked with black connecting lines.
Watch Out for the Fire Ant
Thursday, August 21st, 2008Just found a great resource for open source images. Its called WikiMedia commons. It works like WikiPedia, volunteers post, edit, and manage multimedia content. The media content that then ends up on in the site library is open for any use commercial, private or otherwise.
What this means for me is a source of almost ready made artwork for the CNC machine. Many illustrations are in SVG format, vector instead of raster, and can be easily edited and resized with InkScape.
As a test I started with this original image except I got the SVG version,
Try TriSpiral Again
Tuesday, August 5th, 2008Decided to work on the gradient for the Tri Spiral and give it another go. This time I used the Gimps shaped angular gradient to make the center of each arm of the spiral light and the outer edges dark. After this I selected the white background and changed it to black.
This left the edge still with a little lighter shade then the black background. Since I did not want the edge milled higher, I used the brush tool to write over all of this slightly lighter color with solid black. This picture is before the final edit, notice the white on the edges.
Home is Where the Heart is…
Tuesday, August 5th, 2008Finally figured out the home switches. It turned out to be pretty simple once I got moving on it. There were three wires coming out of each optical switch. After probing around, it was discovered that:
Purple was +5 volts
Yellow carried the signal, either high or low of the switch
Black was connected to ground.
These connections were found by carefully piercing the the insulation of each of the 3 wires with a sharp stick pin and then probing with a continuity meter in the wiring box to locate were the connection came out. Once the associated screw terminals were located, it was pretty easy to use the ohmmeter to find the pins on the parallel port connector.
