This project was actually completed in March 2009, WOW!!!
Our house was built in the 30’s and some some of the fixtures are still from that time period. One of the rooms in our house had and old bare bulb in the ceiling, it used to be switched by a pull chain but that had long since broken. The only way to turn the light on was to reach up and screw the bulb in, and reverse the process to turn it off. Not so fun!
After removing the old fixture, I realized the ceiling tiles around opening were very tattered, cracking and peeling back. The base of my new light was not large enough to cover the area, and the ceiling tiles were way to old to be replaced. Thinking about some way to cover this area before I put up the light, my brain saw the opportunity to use the CNC machine. Aha!! I had figured out a way to spend the Saturday playing with the machine in the guise of working on the house, brilliant. 😉
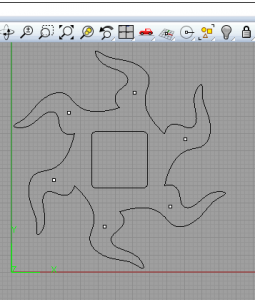
Actually it didnt’ take all that long. I measured the hole opening and then drew up an outline in Rhino. Next I drew a circle out from the center of the box that was big enough to cover my defaced ceiling area. Next I added some curves and then projected them around the curve to get something that kind of looked like a sun. Setting up two profile cuts with Rhino CAM was the only thing left to complete the job.
Finally off to the machine to cut this out. I decided to be brave and cut this out in one pass, partly because I wanted to get back to the real project at hand and partly because I wanted to see if the OZO could take it. This plywood is only .20 inch thick but so far, when cutting this material I have always used two passes.
The machine had a hard time with the my decision, it squealed so loud it made my heart race, again I found myself hovering over the stop button with one hand and shielding my face with the other. This spindle, is going to need upgrading if i really want to be able to cut things out quickly, however that’s for a future post…
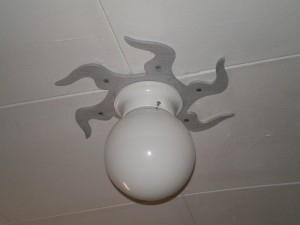
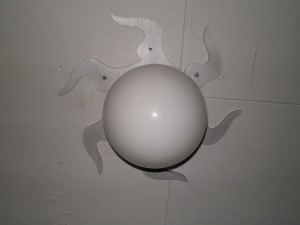
I drilled the holes by hand and finished it up with some silver spray paint. Pictures of the finished project, file parameters, and as always the gcode files are below. If anyone wants to spend a day putting up funky ceiling fixtures in their house, nows your chance!
Enjoy!!!
CAM properties:
Material Thickness .20, cutting depth .21 inches cut in 1 pass
Spindle speed set at 10,000 rpm
Plunge 5 in/min
Cut 10 in/min


